

How To Change Magterial Color On Cura
- Author
- Recent Posts
Besides many test devices, Martin now has his fourth own 3D printer running and prints as a hobby for friends, family and himself. He is happy to share his experience with each new commodity.
Disclosure: Links marked with * are Chapter Links. I earn from qualifying purchases if you decide to make a purchase through these links – at no additional cost for you lot!
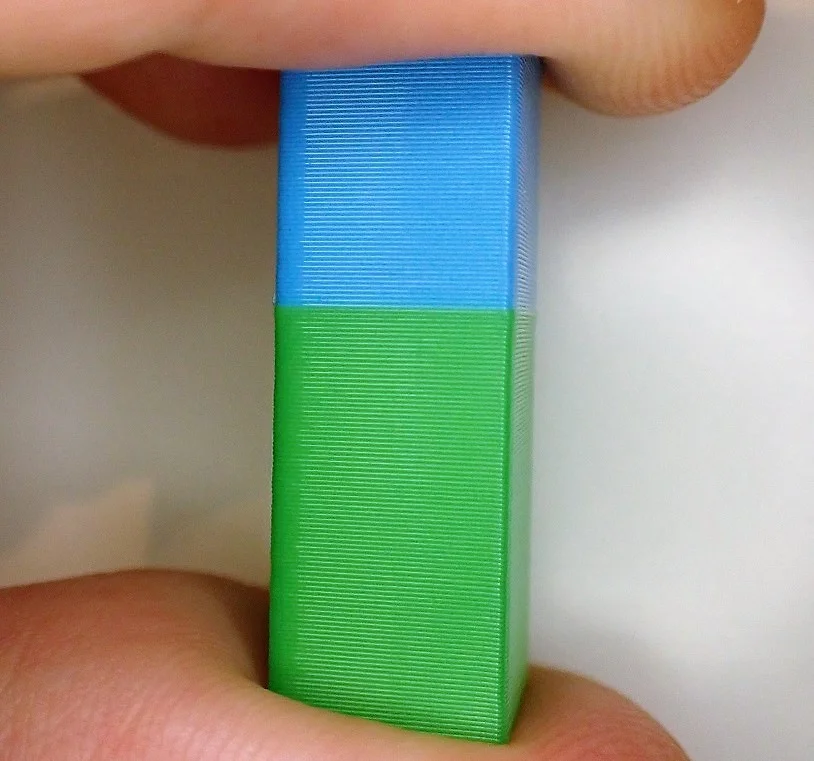
In addition to the 'Pause at Height Script', Cura likewise allows you to apply the 'Filament Change Script' to change the filament during printing.
With the Cura filament modify script, the filament can exist changed at a specific layer during printing. This makes it possible to realize multicolor 3D prints without a dual extruder. In the script, you tin can fix the layer, the retraction and the filament output.
How to exercise this in particular, which errors tin occur and how to solve them, yous volition learn in this stride-past-step guide.
Step one: Notice the Layer for the Change in the Preview
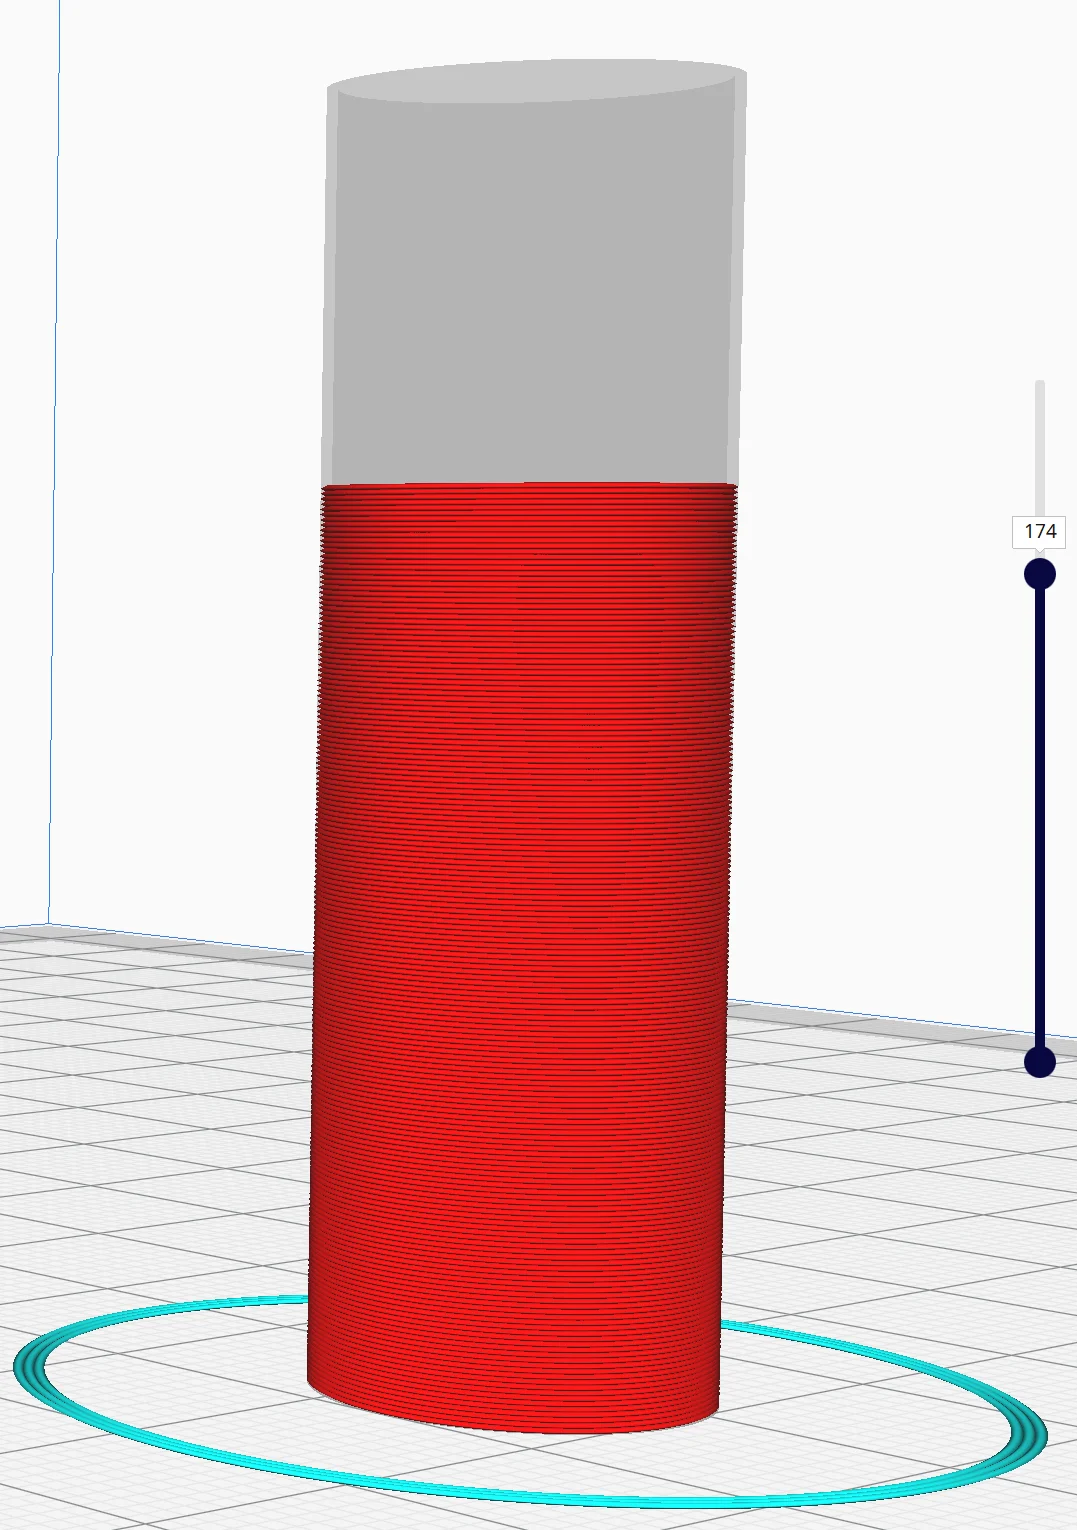
Y'all probably have an exact thought of where the color change should happen on your object. The height for this is specified in the filament change script in layers.
To detect the right layer, yous offset have to piece the object without the script and and so wait for the correct layer in the preview.
Yous can manually switch through the layers using the slider on the right side.
The selected layer will be printed with the new filament after the filament change.
Step 2: Extensions > Post Processing > Modify Thousand-Lawmaking

The settings for scripts are not found in the normal print settings simply in the menu bar of Cura.
Extensions > Post Processing > Modify 1000-Code
The distinction between impress settings and scripts makes it articulate that scripts should be made after the bodily print settings. They insert special events into the impress and practise not change the actual impress settings.
Footstep 3: Add together the Filament Change Script

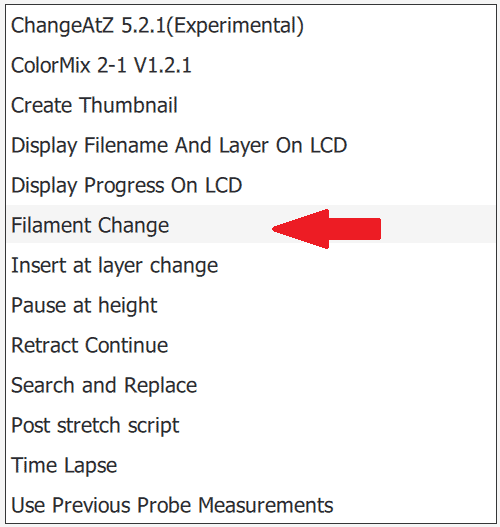
In the window that opens, you can add together various scripts. The Filament Change script can also be found in the dropdown menu.
With this carte, you lot can too insert several scripts one afterwards the other. Information technology is also possible to realize several filament changes in one print. Insert a script for the filament modify for each filament change. The only setting you accept to change is the layer number.
Step iv: Adjust the Script Settings
In this step, you lot have to brand the settings for the script. The about important setting is of course the layer count at which the new filament should be printed.

Layer: Here yous determine the layer at which the new filament is to be used. After the previous layer, the interruption is inserted and the filament is changed.
Information technology is besides possible to insert several filament changes via the same script. Y'all can list the different layer numbers one after the other separated past a comma. The same script volition so be repeated for these layer numbers.

Use Firmware Configuration: Some 3D printers are equipped with firmware that allows filament changes during printing via the menu. This checkbox allows you to utilize this congenital-in filament change and perform information technology at the defined layer.
If you actuate the checkbox, the settings for 'Initial Retraction', 'Later Retraction Altitude' and for the X- and Y-positions disappear. These settings are then controlled past the firmware.

Initial Retraction: Here you specify in millimeters the retraction length for the filament. The time of this retraction is directly after the last layer earlier the print head moves to the location of the filament change. This prevents a blob of excess filament at the end of the final layer.

Later Retraction Distance: With this setting, you specify how far the extruder should retract the filament. This value depends on which 3D printer you are using. If you want to eject the filament completely, this value should be at least as long as the length between the nozzle tip and the extruder inlet.

X/Y Position: Hither you tin set the XY coordinates for the printhead. Equally soon as the pause for the filament change starts, the printhead moves to this position to change the filament.
Most of the time the default cipher position is useful. For some printers, withal, a different position may be more helpful for irresolute the filament more conveniently.

Z Position (relative): Just as with the XY coordinates, y'all can also specify the Z coordinate at which the filament change should take place. Be aware, however, that this value is calculated relatively. If you enter 0 mm, the printhead will not move to Z = 0 mm but will remain at the height information technology was at. If you lot enter i mm, information technology moves upwards one millimeter, and so on.
Step 5: Piece the Object Once more
After you lot accept programmed the script, you can shut the window. Now you have to slice the object again to employ the changes.
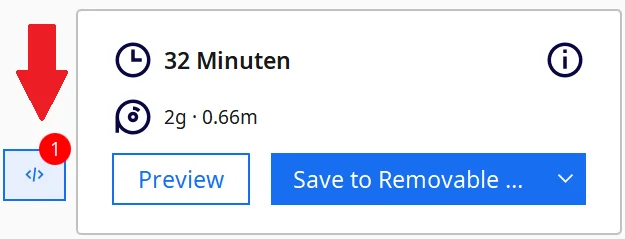
Once you have programmed a script, yous will see a notice for it in the lower correct corner of the Cura interface.
Every bit with the print settings, scripts are saved when you exit the program and retained when you start information technology. So that you don't accidentally use the script again, this hint is clearly visible.
Footstep 6: Start Printing
After yous have sliced the object and sent information technology to your 3D printer, you can beginning press.
However, you should non permit the 3D printer out of your sight for as well long in order not to miss the filament change. If the 3D printer waits too long for you lot, the already printed material could cool down too much. With PLA, yet, this is usually non a problem.
Step vii: Modify Filament and Keep Printing
Once the script has started and the filament has been retracted from the 3D printer, yous can install the new filament and proceed press.
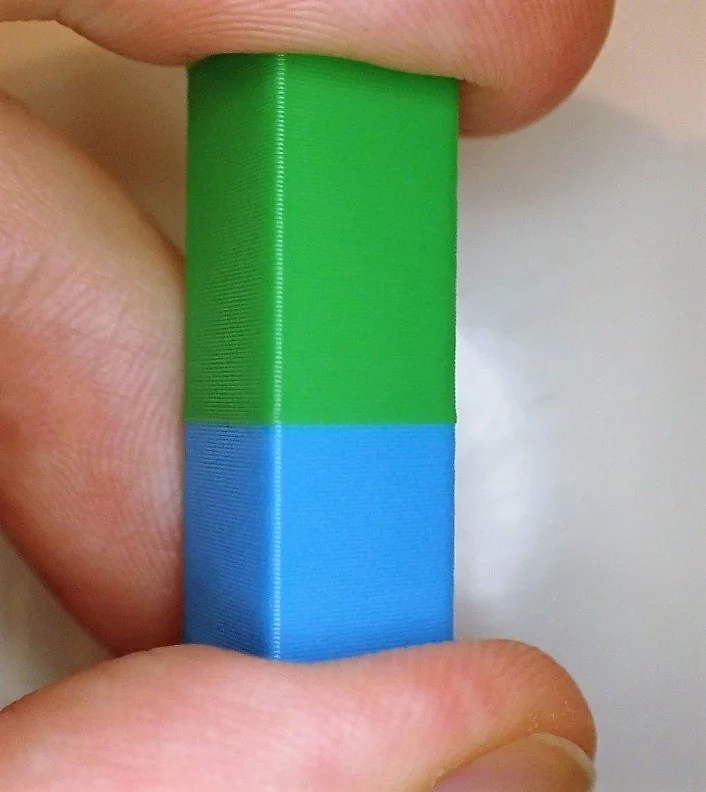
If yous did everything right, the color change or material change should be seamless. If not, there are several ways to optimize.
Troubleshooting – Cura Filament Change
Although the filament change script settings in Cura are quite unproblematic, they can often lead to complications. Once you have plant the right settings for your printer, information technology may have ane to iii exam prints.
I would definitely propose you to exercise the filament change with small examination objects. Small test objects that only take a few minutes and a few grams of filament will keep y'all from ruining a larger print.
Firmware does not recognize the script:
With older 3D printers information technology is possible that the integrated firmware does not recognize the M600 control of the script. So the printer will simply ignore the script and continue printing without stopping.
To bank check if the firmware of your 3D printer knows the command, you can open the configuration file and search for the M600 command. If it shows up, it volition reply to the script. If you don't find information technology, the printer will merely keep printing as if the script wasn't programmed.
If it is not at that place, yous should update your firmware. Newer versions are usually uniform.
Blobs, zits and excess material at the transition betoken:
1 of the nearly common errors during filament change is excess fabric at the transition point. The main crusade of this mistake is an overpressure in the nozzle that has not been properly relieved.
The all-time way to save this pressure is to retract the filament from the nozzle. There are two points in time at which the hulk can occur: at the get-go and at the terminate of the pause. For the starting time of the intermission, in that location is the setting 'Initial Retraction' in the script.
If the blob happens at the beginning, you should set the value here a little higher so that the filament is retracted further and can't escape unintentionally. If the blob happens at the cease of the intermission, yous have to make sure that afterward the filament modify the filament doesn't come out of the nozzle earlier the printer starts working again.
Warping or poor impress bed adhesion:
Commonly the print bed temperature should exist constant during the script. Yet, at that place take been cases where the temperature has been set to 0°C for some reason, causing the impress bed to absurd significantly during the filament change.
When this happens, it tin can apace cause warping or cause the entire object to detach from the printing plate. If this happens to you, you should update your firmware every bit this should not happen.
Otherwise, yous could utilize the script for 'Interruption at Acme' instead of the filament alter script. There you can define the temperatures manually.
Layer Shift (shift in Ten/Y direction):
This problem is highly dependent on the 3D printer you are using. On some printers, you may experience more layer shifting when changing filament during printing than on others. It all depends on how piece of cake it is to motion the stepper motors past manus during performance.
If you accidentally change the XY position of the print head while changing filament, this volition directly affect the 3D object. The 3D printer will not observe the misalignment and volition continue to print as if cypher happened. As a effect, all layers that are printed after the filament change are shifted past exactly this offset.
Therefore, you should make sure that you do not move the print head when changing the filament.
Height Shift (shift in Z direction):
This error is basically the same error as Layer Shift, merely in Z direction. However, information technology manifests itself quite differently and is sometimes difficult to identify. If you have accidentally shifted the impress bed or the X-axis with the print caput in Z-management during the interruption, the print will start likewise high or too low after the suspension.
In extreme cases, either the object can be detached from the print bed by the nozzle, because the nozzle starts much too low and collides with it. On the other hand, it can also happen that the nozzle suddenly starts printing again in the air when the shift in positive Z-direction has happened. Then in that location is either a minor gap between the layers or you lot become the famous filament spaghettis and have to beginning over anyway.
Poor layer adhesion:
Poor adhesion betwixt the individual layers before and afterwards the pause tin non only be caused by an adventitious shift in the Z-axis. During the filament change, the terminal layer that was printed cools down. So the new layer has to be printed on cold material. This can lead to poor adhesion with some materials. You lot could then try to enhance the temperature for the new layer by a few degrees.
Poor adhesion earlier and after the pause is also mutual when you change the cloth and not just the color. There are combinations of materials that do not adhere well to each other. In any case, make sure you beginning printing again at the right temperature for the new filament.
Disclosure: This website is the property of Martin Lütkemeyer and is operated by Martin Lütkemeyer. Martin Lütkemeyer is a fellow member of the Amazon Services LLC and other Affiliate Programs. These are chapter advertising programs designed to enable websites to earn ad acquirement through advertising and linking to Amazon.com and others. Links marked with * are chapter links.
Source: https://the3dprinterbee.com/cura-filament-change/
Posted by: baileyinctureniou.blogspot.com
0 Response to "How To Change Magterial Color On Cura"
Post a Comment